User guide for signing and encrypting emails with the GLOBALTRUST CLIENT certificate on your Apple iPhone
As of May 10, 2023
1 Basic
1.1 Goals of this document
A step-by-step guide on how to add the certificate to your iPhone to then sign and/or encrypt emails. This guide was created for an Apple iPhone (iOS version: 16.2).
1.2 Purchase of suitable certificate
The following product type of our certificates supports the signing and encryption of e-mails on an Apple iPhone
✓ CLIENT
✓ You can find an overview of all products here
✓ You can find general information on signing and encrypting e-mails here
2 Short version
Installation of the certificate
✓ Open our Globaltrust Mail→ Click on the download link → Enter your data → “Send” → Install .p12 file → Allow configuration profile
✓ “Settings” → “Profile loaded” → “Install” → enter the screen password → “Install” → enter the password for the certificate
Add certificate to email account
✓ Search for “Mail” in the settings and click → select the email that belongs to the certificate
✓ Click on “Account” → “Advanced settings” → “Sign” and/or “Encrypt by default”.
Send signed email
✓ Create new email draft → Enter recipient, subject and message → Send
Send signed and encrypted e-mail
✓ Search for “Mail” in the settings and click → select the email that belongs to the certificate
✓ Click “Account” → “Advanced Settings” → “Sign” and “Encrypt”.
✓ Install the recipient’s certificate.
✓ Create new email draft → Enter recipient, subject and message → Send
Note: With S/MIME encryption, both communication partners require a suitable certificate.
3 Detailed documentation
3.1 Step I – Installation of the certificate
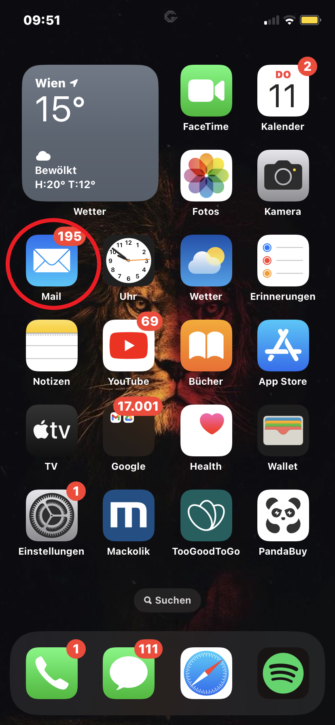
Legend:
- Open “Mail”
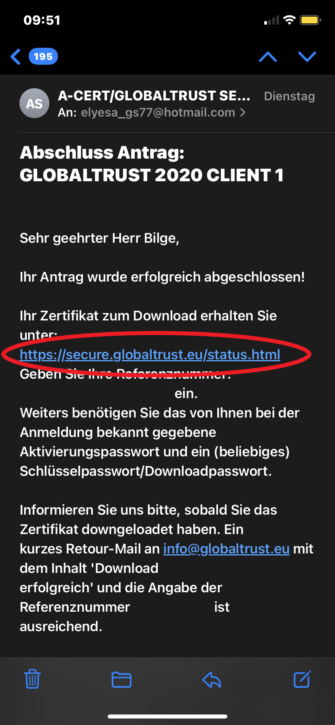
Legend:
- Open our Globaltrust email.
- Open the link to download the certificate.
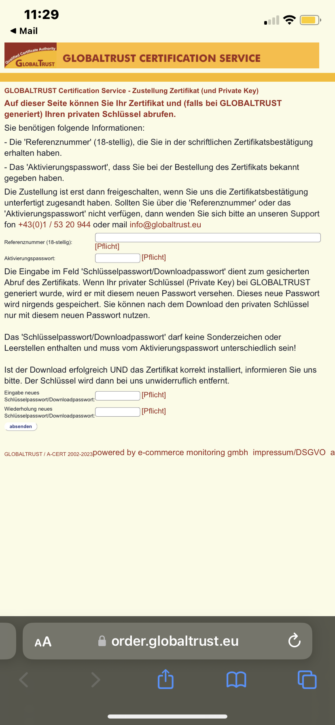
Legend:
-
- Enter the 18-digit reference number (is included in the e-mail)
- Enter activation pin
- Enter new certificate password
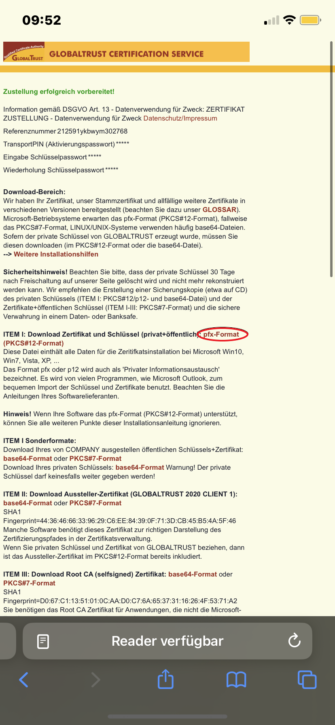
Legend:
-
Install pfx format
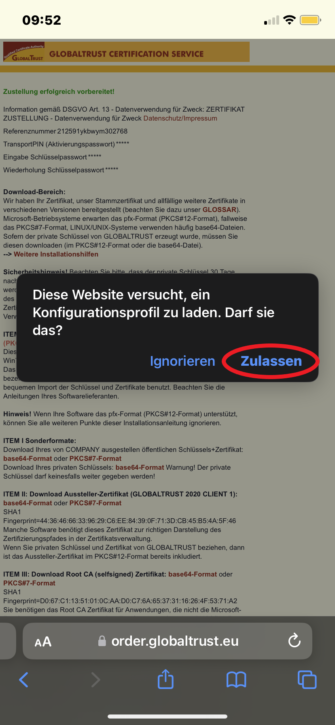
Legend:
-
Click “Allow”.
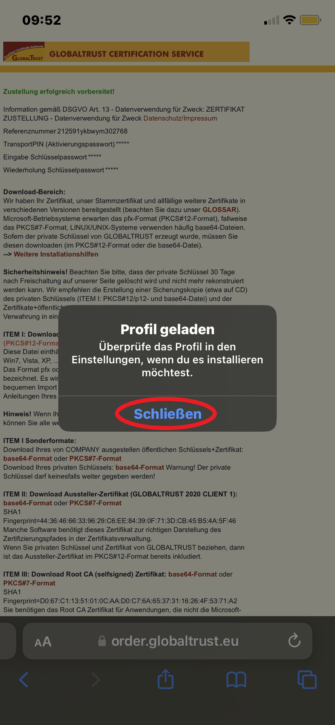
Legend:
- Click on “Close”
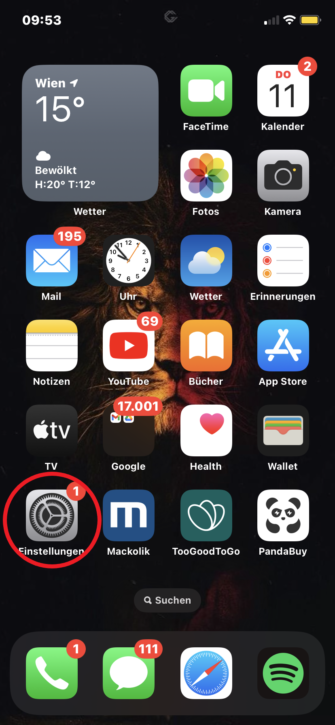
Legend:
- Open “Settings”
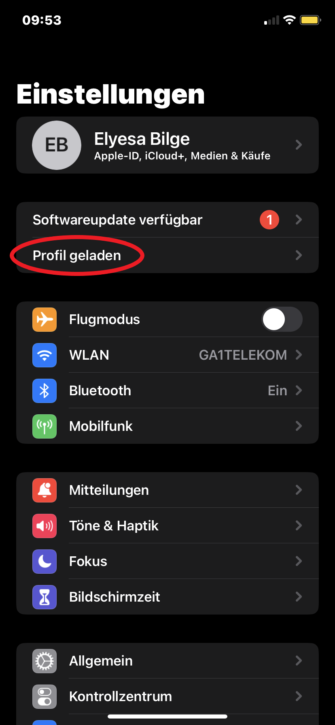
Legend:
- Click on “Profile loaded”
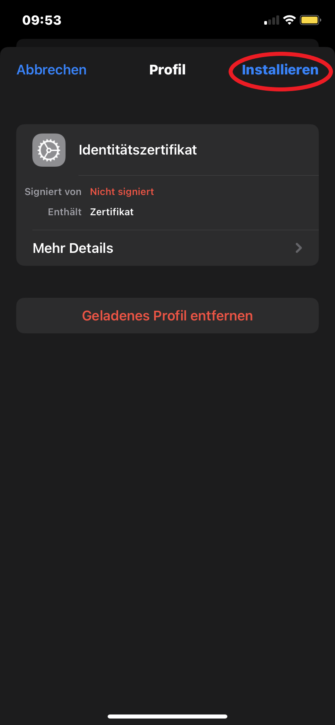
Legend:
- Click on “Install”
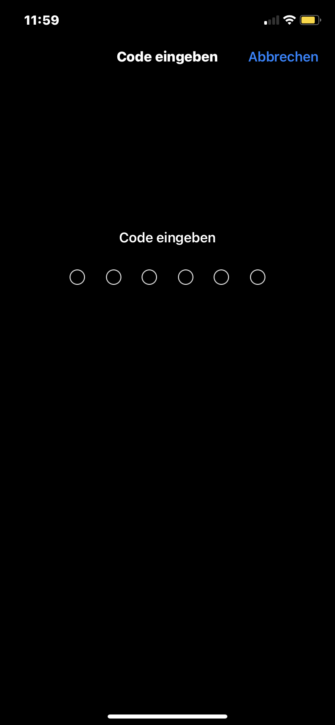
Legend:
- Enter “Screen Code” to confirm the installation
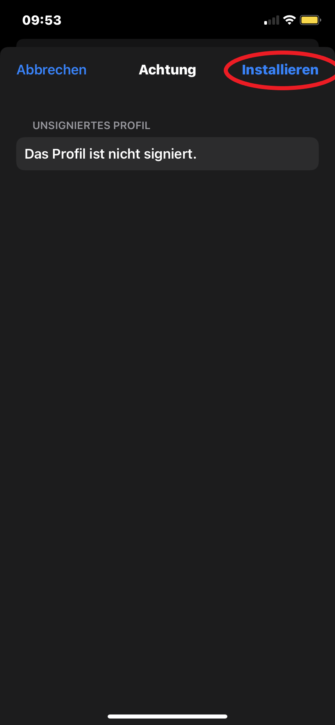
Legend:
- Click “Install”.
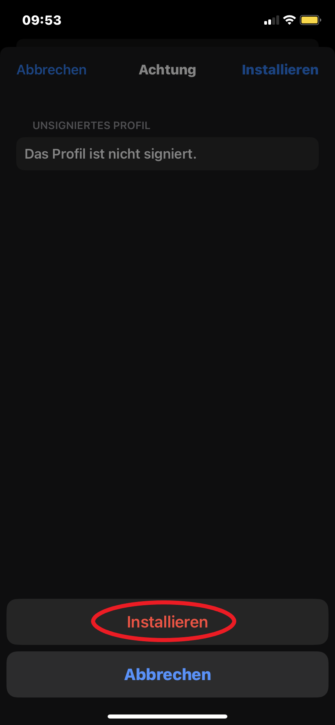
Legend:
- Click “Install”.
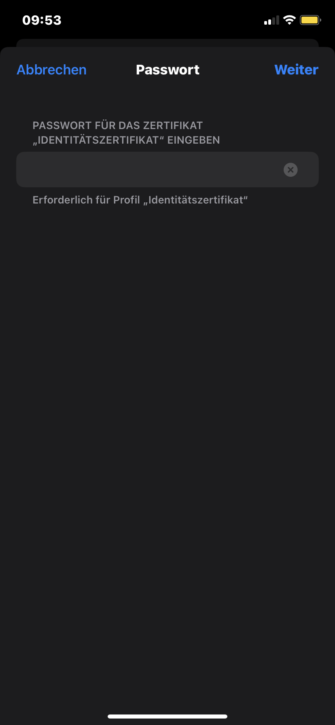
Legend:
- Enter the password of the certificate
Note: This is the password that you entered as the new password when installing the certificate.
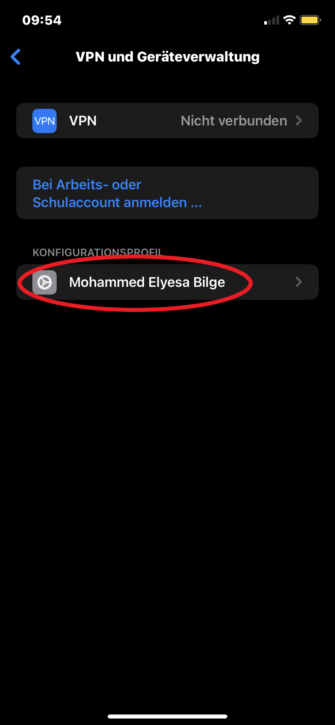
Legend:
- Here we now see the configuration profile which we have set up for a signature or encryption.
3.2 Step II – Add certificate to email account
Now that we’ve installed our certificate and set up our configuration profile, we’re ready to sign emails.
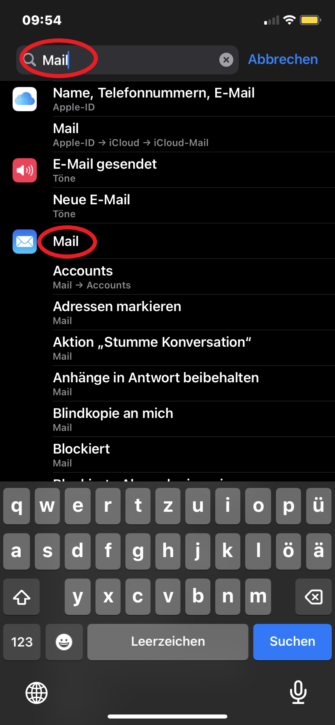
Legend:
- In Settings, search for “Mail” in the search bar
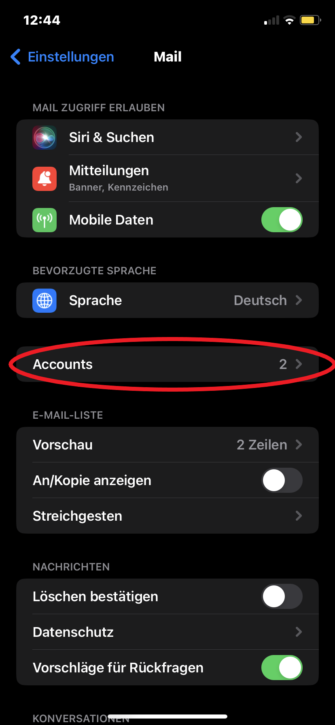
Legend:
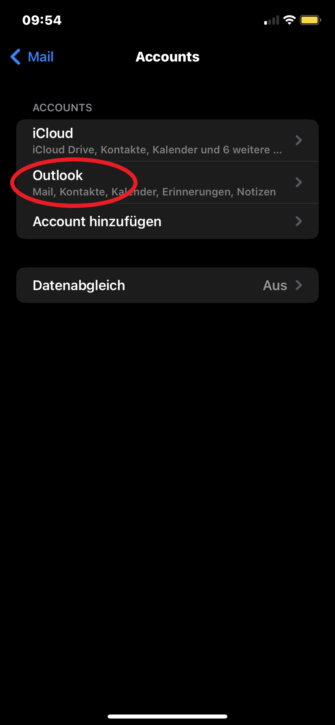
- Click on “Accounts”.
Legend:
-
Select the e-mail account that is also assigned to the certificate. In this case it is an Outlook mail.
Legend:
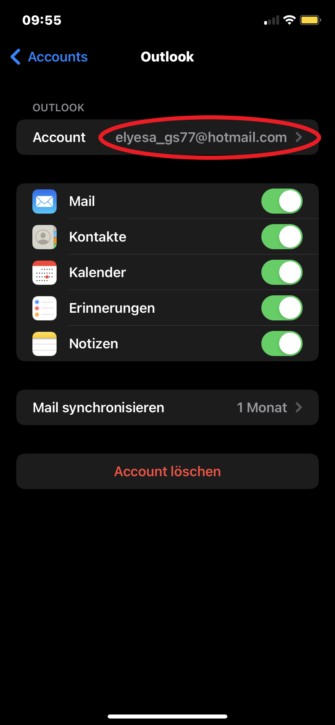
- Click on “Account”.
Legend:
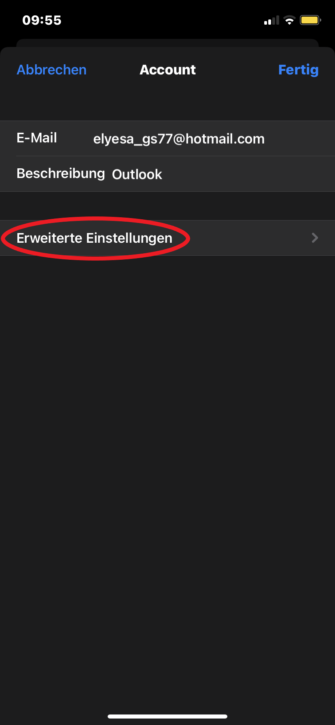
- Click on “Advanced Settings”
Legend:
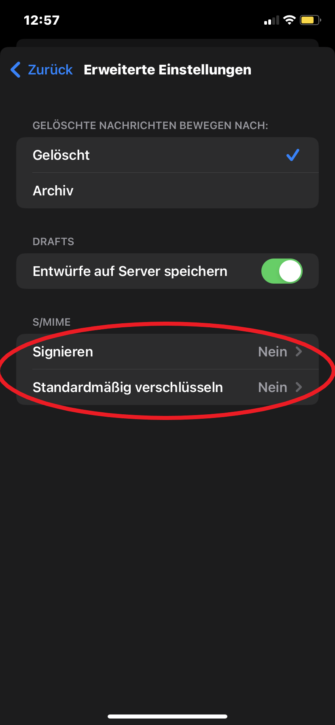
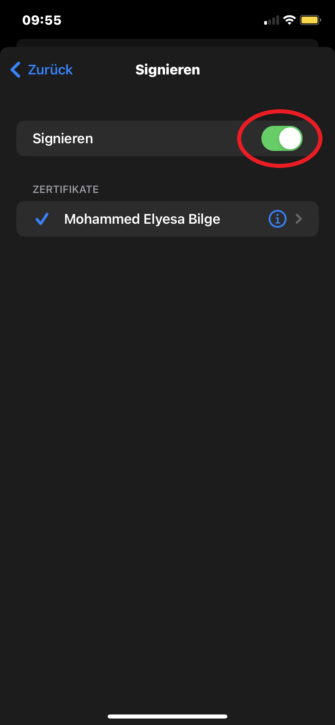
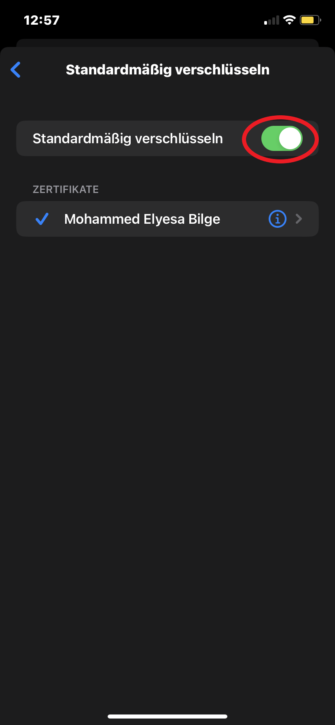
- Under the following sub-items you can activate the signature or the standard encrbyption
Note: With S/MIME encryption, both communication partners require a suitable certificate.
Legend:
- Click on the controller → Controller turns green and a tick appears next to the certificate.
3.3 STEP III – Send signed email
In order to carry out this section, you have to click on the tab in the sub-item Signing in the last step.

Legend:
- Open settings.
- If the “Mail” app has not been closed beforehand, it must be closed once so that the certificate can be used.
- Open “Mail” app
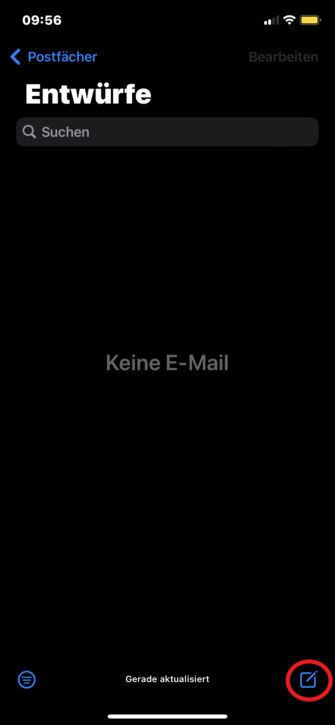
Legend:
- Create a new email draft
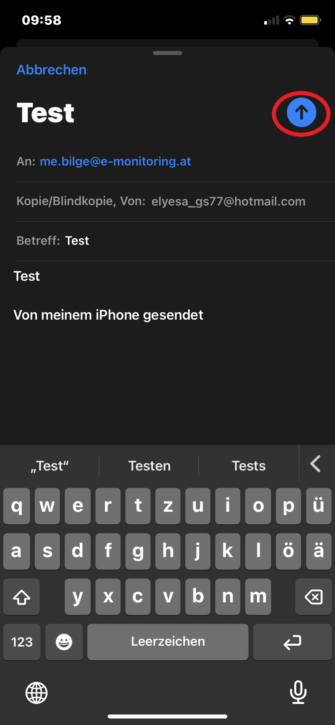
Legend:
- Enter the recipient, subject if necessary, and a message.
- Click on the arrow to send your message
3.3 Schritt IV – Send signed and encrypted e-mail
To carry out this section, you have to click on the tab in the last step, in the sub-item “Sign” and “Encrypt by default”. In addition, with S/MIME encryption, both communication partners must have a suitable certificate.
Before you can send an encrypted message, you must also install the recipient’s certificate
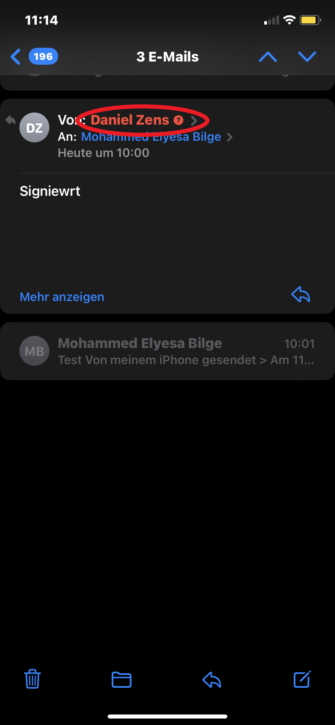
Legend:
- Click on the recipient whose certificate you want to install.

Legend:
- Click View Certificate
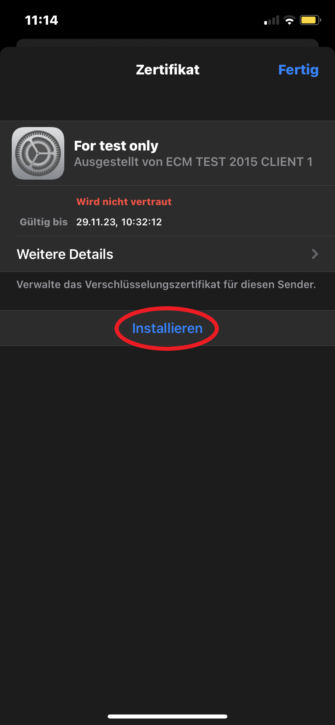
Legend:
- Click on “Install”
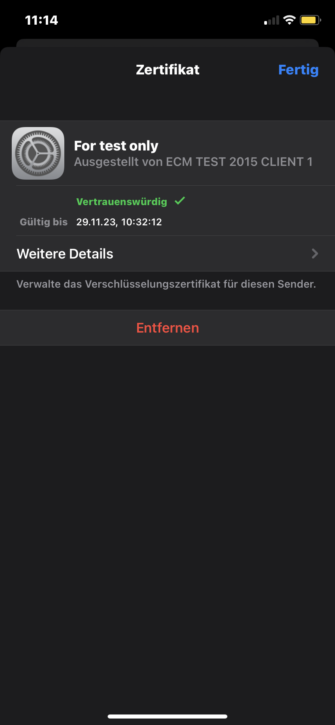
Legend:
- After successful installation, click on “Done” at the top right.
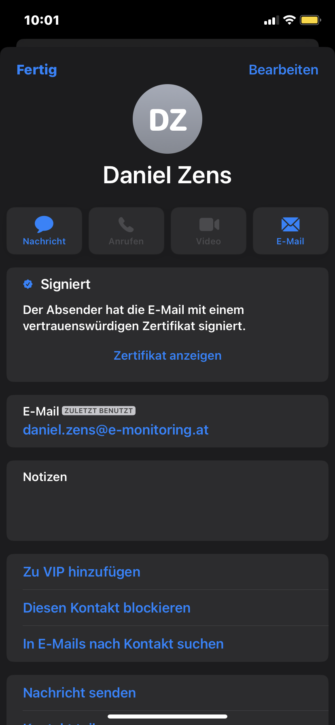
Legend:
- After successful installation, a tick appears next to the recipient’s certificate.
If you have activated the “Standard encryption” then you cannot send an encrypted e-mail to people whose certificate you have not installed. If you try anyway. you will see a crossed-out lock in the recipient bar on the right, as also indicated below.

If you have activated the “Standard encryption” and want to send an e-mail to a person whose certificate you have already installed, then after entering the recipient you will notice that the lock is no longer crossed out and at the top there is an inscription “Encrypted” shows up.
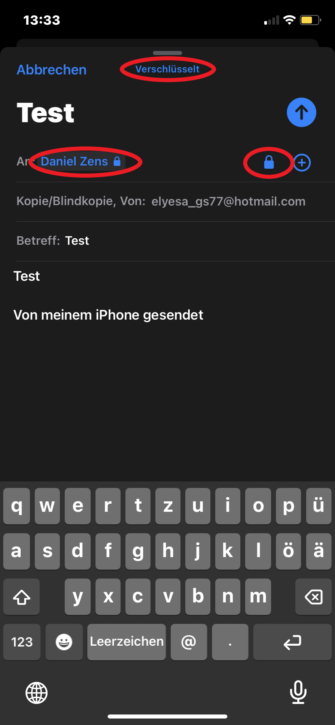
Legend:
- Click on the arrow to send your encrypted and signed email.

